기본 실행 명령을 서버리스방법으로 오픈하도록 변경

package.json 코드 수정

"scripts": {
    "dev:webpack": "webpack-dev-server --mode development",
    "dev": "netlify dev",
    "build": "webpack --mode production",
    "lint": "eslint --fix --ext .js,.vue"
  },


netlify.toml 코드 수정 -> 포트및 웹팩으로 실행하는 명령부분 수정 (위에서 선언한 명령어와 맞춰줘야함)

# 개발 모드
[dev]  
  framework = "#custom"                 # 감지할 프로젝트 유형을 지정합니다. 앱 서버 및 'targetPort' 옵션을 실행하는 명령 옵션은 ''
  command = "npm run dev:webpack"       # 연결할 프로젝트의 개발 서버를 실행하는 명령(스크립트)을 지정합니다.
  targetPort = 8079                     # 연결할 프로젝트 개발 서버의 포트를 지정합니다.
  port = 8080                           # 출력할 Netlify 서버의 포트를 지정합니다.
  publish = "dist"                      # 프로젝트의 정적 콘텐츠 디렉토리를 지정합니다.
  autoLaunch = false                    # Netlify 서버가 준비되면 자동으로 브라우저를 오픈할 것인지 지정합니다.


webpack.config.js 코드 수정 -> 포트 수정 (위에서 선언한 포트와 맞춰줘야함)

// 개발 서버 옵션
  devServer: {
    host: 'localhost',
    port: 8079,
    hot: true
  }


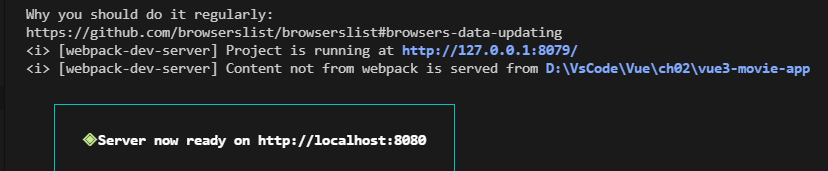
명령어 실행: npm run dev -> 포트번호 설정 확인 및 동작 확인


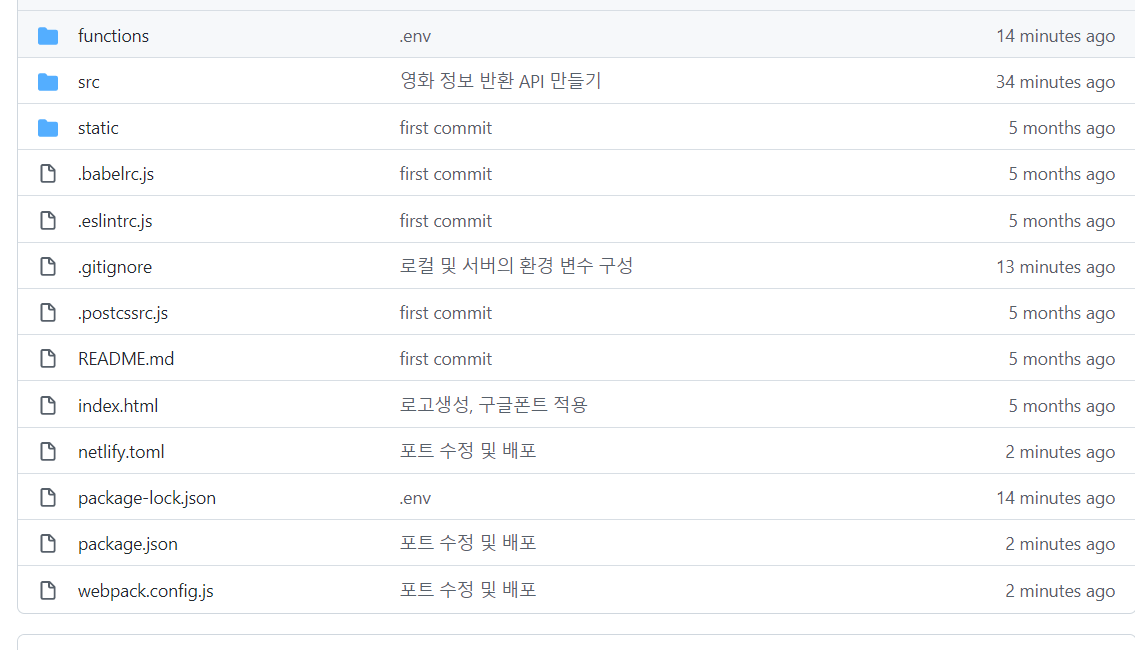
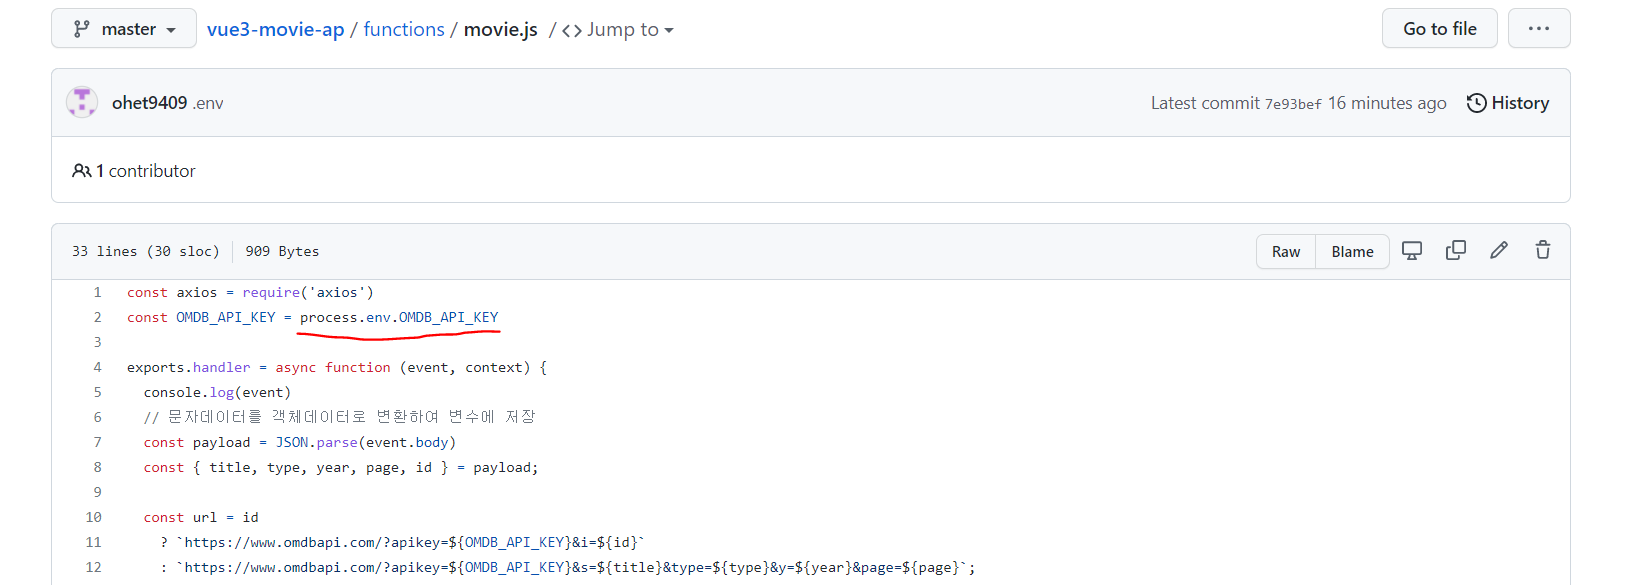
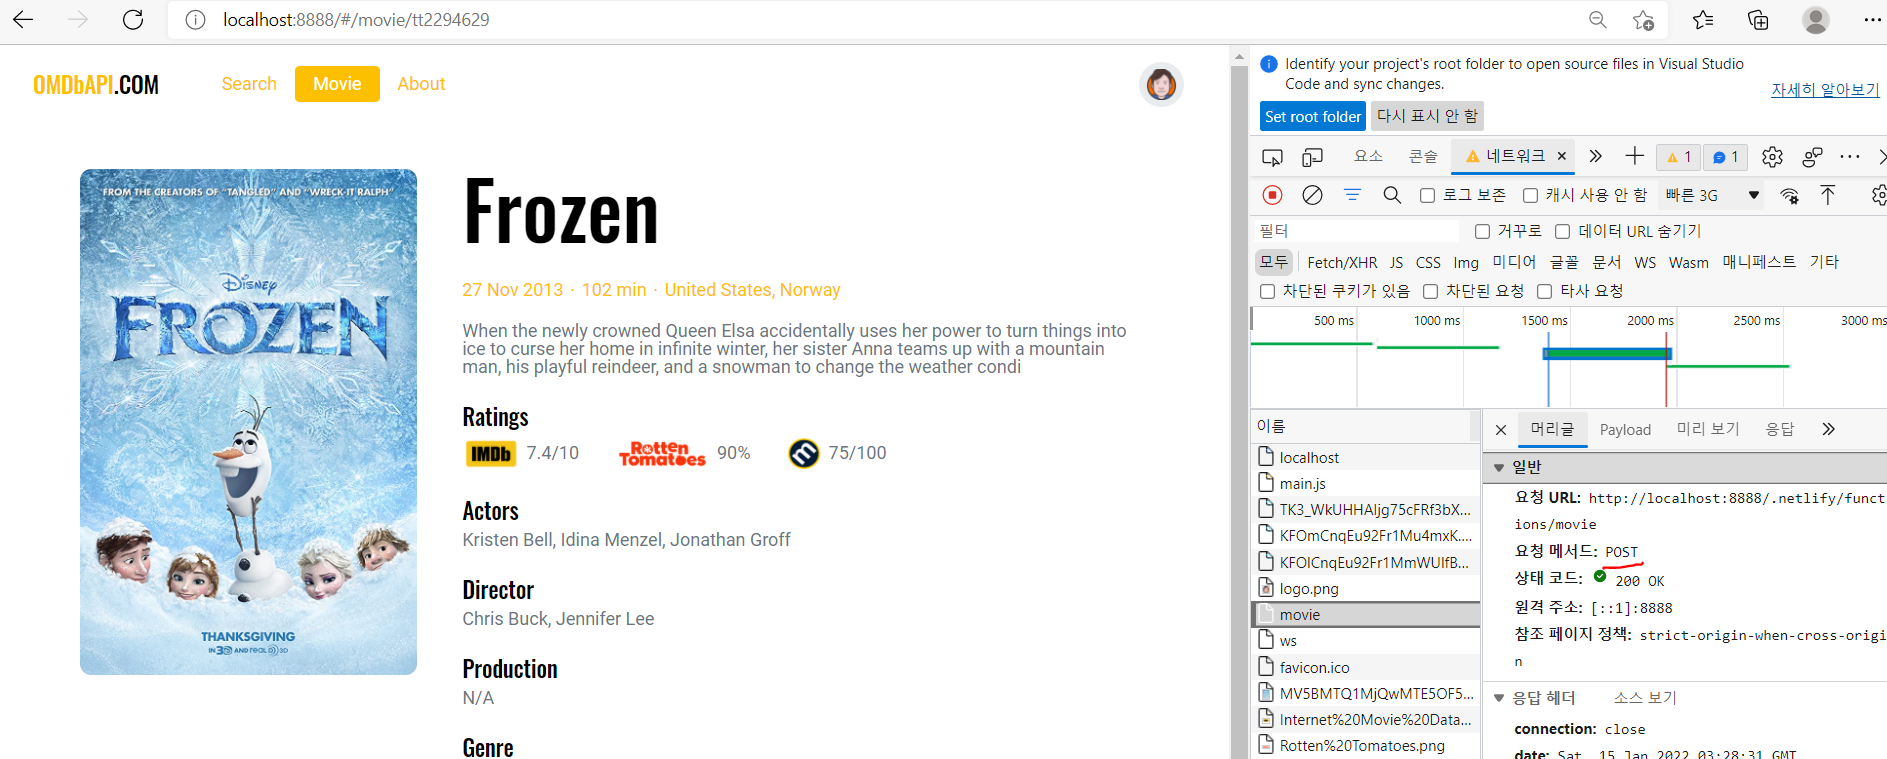
github에 올리고 확인 -> .env 파일이 없는것을 확인, movie.js파일에서 중요정보 보여지는지 확인


netlify에서도 정상동작 확인

'프론트엔드 > Vue.js' 카테고리의 다른 글

로컬 및 서버의 환경 변수 구성  (0) 2022.01.15
영화 정보 반환 API 만들기  (0) 2022.01.15
Netlify-CLI 구성  (0) 2022.01.15
Netlify Serverless Function  (0) 2022.01.14
SPA  (0) 2022.01.14

git 으로 코드를 올렸을 경우 다른 사용자가 중요코드를 확인할수 있는 문제점 발생


그런 문제점을 보완하기 위해서 환경변수로 설정하여 관리한다.


패키지 추가

명령어: npm i -D dotenv-webpack


webpack.config.js 파일 코드 추가

const Dotenv = require('dotenv-webpack')

new Dotenv()


루트경로에 .env 파일 생성 및 코드 추가

띄어쓰기나 따옴표가 안들어가도록 주의

OMDB_API_KEY=비밀

functions -> movie.js 코드 수정 -> 환경변수 데이터 가져오기 -> 기존 변수 삭제

const axios = require('axios')
const OMDB_API_KEY = process.env.OMDB_API_KEY


정상동작 확인


github에 환경변수 파일을 올리지 않기 위해서 .gitignore 파일에 코드 추가

.env


.env는별도로 관리해주어야한다.


netlify에서 환경변수 관리

url: Build & deploy | Site settings (netlify.com)


Netlify App


app.netlify.com

'프론트엔드 > Vue.js' 카테고리의 다른 글

포트 수정 및 배포  (0) 2022.01.15
영화 정보 반환 API 만들기  (0) 2022.01.15
Netlify-CLI 구성  (0) 2022.01.15
Netlify Serverless Function  (0) 2022.01.14
SPA  (0) 2022.01.14

axios 사용방법 사이트

axios/axios: Promise based HTTP client for the browser and node.js (github.com)


GitHub - axios/axios: Promise based HTTP client for the browser and node.js

Promise based HTTP client for the browser and node.js - GitHub - axios/axios: Promise based HTTP client for the browser and node.js

github.com


functions -> movie.js 파일 생성

const axios = require('axios')

exports.handler = async function (event, context) {
  console.log(event)
  // 문자데이터를 객체데이터로 변환하여 변수에 저장
  const payload = JSON.parse(event.body)
  const { title, type, year, page, id } = payload;
  const OMDB_API_KEY = '비밀';
  const url = id 
    ? `https://www.omdbapi.com/?apikey=${OMDB_API_KEY}&i=${id}` 
    : `https://www.omdbapi.com/?apikey=${OMDB_API_KEY}&s=${title}&type=${type}&y=${year}&page=${page}`;
  // const url = `https://www.omdbapi.com/?apikey=${OMDB_API_KEY}`;

  try {
    const {data} = await axios.get(url)
    if (data.Error){
      return {
        statusCode: 400,
        body: data.Error
      }
    }
    return {
      statusCode: 200,
      body: JSON.stringify(data)
    }
  } catch (error) {
    return {
      statusCode: error.response.status,
      body: error.message
    }
  }
}


store -> movie.js 파일 수정

  // 비동기로 동작한다.
  actions: {
    async searchMovies({state, commit}, payload) {

      // 영화검색을 동시에 동작하는 것을 방지
      if(state.loading) {
        return
      }

      commit('updateState', {
        message: '',
        loading: true
        // 검색된 imdbID 데이터의 중복을 제거
        // movies: _uniqBy(Search,'imdbID')
        // message: 'Hello world',
        // loading: true
      })
      try {
                // const { title, type, number, year } = payload
        // const OMDB_API_KEY = '7035c60c'
        // http -> https 로 변경
        //const res = await axios.get(`https://www.omdbapi.com/?apikey=${OMDB_API_KEY}&s=${title}&type=${type}&y=${year}&page=1`);
        const res = await _fetchMovie({
          // 전개연산자 사용
          ...payload,
          page: 1
        })
         console.log(res);
        const { Search, totalResults } = res.data
        commit('updateState', {
          // 검색된 imdbID 데이터의 중복을 제거
          movies: _uniqBy(Search,'imdbID')
          // message: 'Hello world',
          // loading: true
        })
        
        console.log(totalResults) // 261
        console.log(typeof totalResults) // string

        const total = parseInt(totalResults, 10)
        const pageLength = Math.ceil(total / 10)

        // 추가 요청!
        if (pageLength > 1) {
          for (let page = 2; page <= pageLength; page += 1) {
            if (page > payload.number / 10) {
              // 반복문 종료
              // 사용자가 지정한 갯수만큼 보여주도록 설정
              break;
            }
            //const res = await axios.get(`https://www.omdbapi.com/?apikey=${OMDB_API_KEY}&s=${title}&type=${type}&y=${year}&page=${page}`);
            const res = await _fetchMovie({
              ...payload,
              page: page
            })
            const {Search} = res.data
            commit('updateState', {
              // _uniqBy 를 이용해서 중복 제거
              movies: [
                ...state.movies,
                ..._uniqBy(Search, 'imdbID')
              ]
            })
          }
        }
        !!! 이부분수정 {message}
      } catch ({message}) {
        commit('updateState', {
          // 초기화
          movies: [],
          // 메세지 출력
          message: message
        })
      } finally {
        commit('updateState', {
          loading: false
        })
      }
    },
    async searchMovieWithId({state, commit}, payload) {
      if(state.loading) return 

      commit('updateState', {
        theMovie: {},
        loading: true
      })
      const {id} = payload
      try {
        const res = await _fetchMovie(payload)
        commit('updateState',{
          theMovie: res.data
          // id: id
        })
        console.log(res)
      } catch(error) {
        commit('updateState', {
          theMovie: {}
        })
      } finally {
        commit('updateState', {
          loading: false
        })
      }
    }
  }
  
async function _fetchMovie(payload) {
  // 서버리스 함수로 처리
  return await axios.post('/.netlify/functions/movie', payload)

  // const { title, type, year, page, id } = payload;
  // const OMDB_API_KEY = '비밀';
  // const url = id 
  //   ? `https://www.omdbapi.com/?apikey=${OMDB_API_KEY}&i=${id}` 
  //   : `https://www.omdbapi.com/?apikey=${OMDB_API_KEY}&s=${title}&type=${type}&y=${year}&page=${page}`;
  // // const url = `https://www.omdbapi.com/?apikey=${OMDB_API_KEY}`;

  // return new Promise((resolve, reject) => {
  //   axios.get(url)
  //     .then((res) => {
  //       // console.log(res)
  //       if (res.data.Error) {
  //         reject(res.data.Error)
  //       }
  //       resolve(res)
  //     })
  //     .catch((err) => {
  //       reject(err.message)
  //     })
  // })
}


개발서버 실행: npm run dev:netlify

post방식으로 파라미터를 안보여주는 것을 확인


'프론트엔드 > Vue.js' 카테고리의 다른 글

포트 수정 및 배포  (0) 2022.01.15
로컬 및 서버의 환경 변수 구성  (0) 2022.01.15
Netlify-CLI 구성  (0) 2022.01.15
Netlify Serverless Function  (0) 2022.01.14
SPA  (0) 2022.01.14

공식문서 URL

Netlify CLI Command List


Netlify CLI Command List

Netlify CLI Command List Welcome to the Netlify CLI! This site provides online access to all help strings in the Netlify CLI. For a more in-depth guide, please see our Getting Started guide on our main docs site. If you have questions, ideas, or would like

cli.netlify.com

netlify-dev


x0

What is Netlify Dev? Watch the introduction (24 minutes) Netlify Dev brings the power of Netlify's Edge Logic layer, serverless functions and add-on ecosystem to your local machine. It runs Netlify's production routing engine in a local dev server to make

cli.netlify.com


netlify-cli 패키지 설치

명령어: npm i -D netlify-cli


package.json 파일 코드 수정

"scripts": {
    "dev": "webpack-dev-server --mode development",
    "dev:netlify": "netlify dev",
    "build": "webpack --mode production",
    "lint": "eslint --fix --ext .js,.vue"
  },

netlify.toml 코드 수정

# [functions]
#   directory = "functions"

# Netlify Dev
# https://cli.netlify.com/netlify-dev/#netlifytoml-dev-block

# 제품모드
[build]
  command = "npm run build"
  functions = "functions"       # Netlify 서버리스 함수가 작성된 디렉토리를 지정합니다.
  publish = "dist"              # 프로젝트 빌드 결과의 디렉토리를 지정합니다.

# 개발 모드
[dev]  
  framework = "#custom"         # 감지할 프로젝트 유형을 지정합니다. 앱 서버 및 'targetPort' 옵션을 실행하는 명령 옵션은 ''
  command = "npm run dev"       # 연결할 프로젝트의 개발 서버를 실행하는 명령(스크립트)을 지정합니다.
  targetPort = 8080             # 연결할 프로젝트 개발 서버의 포트를 지정합니다.
  port = 8888
  publish = "dist"              # 프로젝트의 정적 콘텐츠 디렉토리를 지정합니다.
  autoLaunch = false            # Netlify 서버가 준비되면 자동으로 브라우저를 오픈할 것인지 지정합니다.


netlify 개발 서버 오픈 명령어: npm run dev:netlify

브라우저 확인 URL: localhost:8888/.netlify/functions/hello


기존 Netlify를 이용하여 웹페이지를 동작하면 개인의 데이터가 보여지는것을 확인할 수 있다.


Get방식으로 파라미터가 전부 보여진다.


따라서 Function 설정을 따로 해주어야한다.

공식문서 url: Build functions with JavaScript | Netlify Docs


Build functions with JavaScript

Netlify builds, deploys, and hosts your frontend. Learn how to get started, find examples, and access documentation for the modern web platform.

docs.netlify.com


기존 프로젝트에 폴더 및 파일 생성

1. 루트경로 -> netlify.toml 파일생성

[functions]
  directory = "functions"

2. 루트경로 -> functions 폴더 생성 -> hello.js 파일 생성

exports.handler = async function(event, context) {
  return {
    statusCode: 200,
    // 문자데이터 반환 방법
    //body: 'Hello world'
    
    //객체 데이터 반환 방법
    body: JSON.stringify({
      name: 'HEROPY',
      age: 85,
      email: 'thesecon@gmail.com'
    })
  }
}


git hub에 올려두기

1. git add .

2. git commit -m 'Add Netlify functions'

3. git push origin master


netlify에 적용되었는지 확인


url 접근으로 확인 -> 뒷부분에 .netlify/functions/hello 추가

https://epic-albattani-ceea5b.netlify.app/.netlify/functions/hello


Traditional Web Application: 데이터를 요청할 때마다 페이지로드(전통적인 웹 어플리케이션)

위 방법의 단점을 해결하기 위해 SPA로 대체한다.


SPA: Single Page Application

페이지 로드 없이 데이터 요청


SPA 장점

1. 빠르고 자연스런 전환으로 훌륭한 사용자 경험 제공

2. 더 적게 요청해 빠르게 렌더링 가능

3. 컴포넌트 단위 개발로 생산성 향상

4. 쉬운 분업화


SPA 단점

1. 느린 최초 로드 => Lazy loading, 브라우저 캐싱를 이용하여 보완

2. 어려운 검색 엔진 최적화(SEO) => SSR, Serverless Functions를 이용하여 보완

3. 모든 데이터 노출 => 비즈니스 로직 최소화하여 작성하여 보완


+ Recent posts